Websters dictionary defines burnishing as “to make (something, such as metal or leather) smooth and shiny by rubbing it”. That’s a simple answer, but just about sums it up. However there is more to it when it comes to concrete, as burnishing is just the final step in the polishing process.
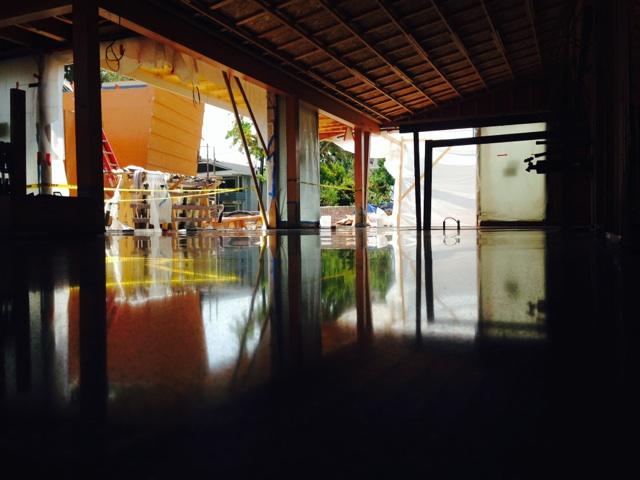
The really heavy lifting of concrete polishing is achieved by using a large 1,000 lb grinder and mechanically refining the floor with sequentially finer grit diamond impregnated blades, like Ricky is doing here (you can see some of the diamond blades there in the boxes) :
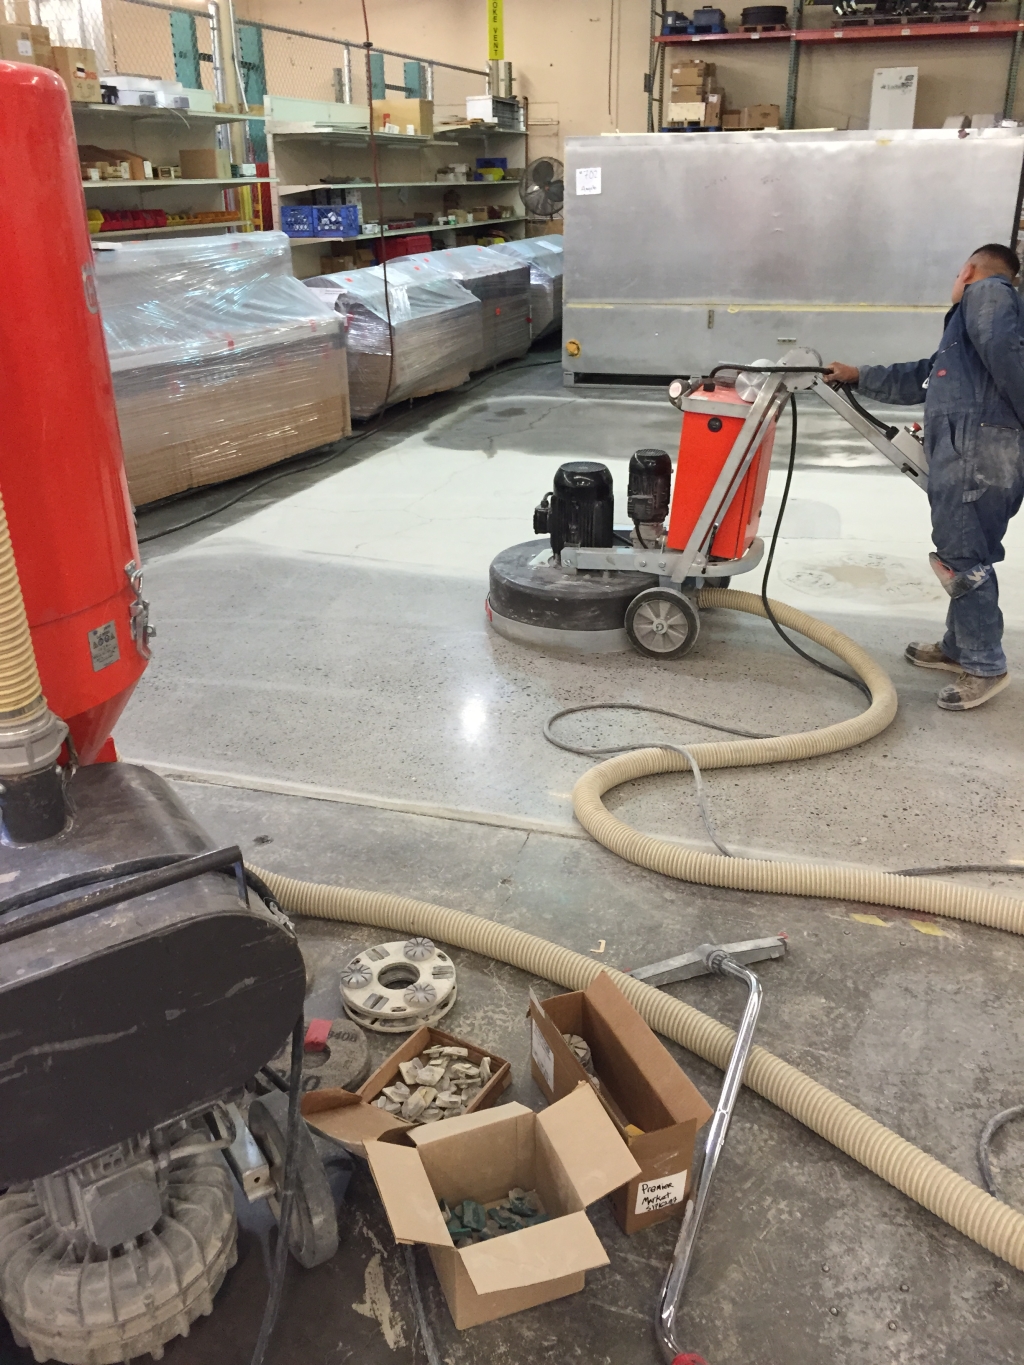
We can run these blades up to 1,500 grit and deliver a beautiful floor. We then apply a product known as a guard (not to be confused with a sealer – more on that later). I’m getting out into the weeds, but bear with me. The guard is a thin penetrating stain resistor which will keep the floor looking great for years to come. The problem is the guard leaves the floor with a matte finish after we worked so hard to polish it. So how do we pop it back to life? You guessed it…BURNISHING!
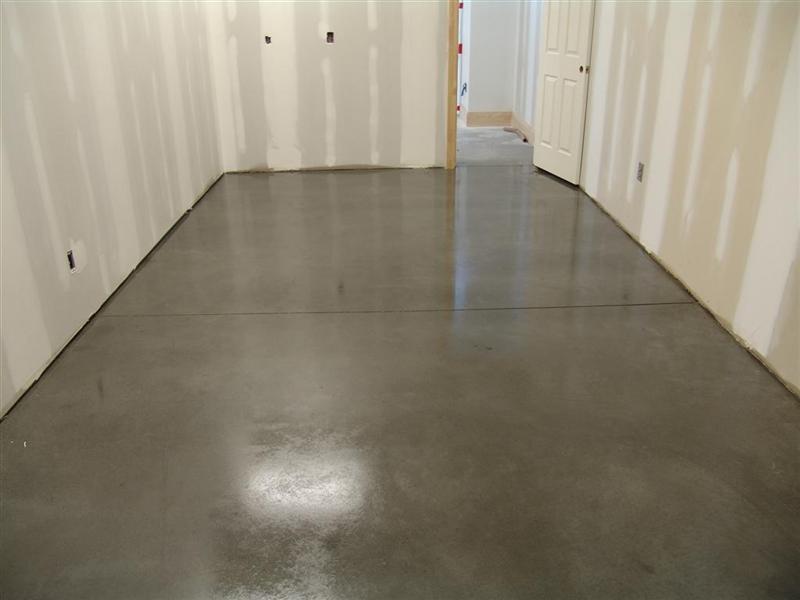
The burnisher is a high speed OSHA approved propane powered tool, that heats the floor as it burnishes with a 3,000 grit diamond impregnated pad. The texture of the burnishing pad feels similar to a scotch brite pad, only with diamonds in it. Yes, you in the back with the face tattoo, DIAMONDS!. Here is what the burnisher looks like and what it leaves the floor looking like.
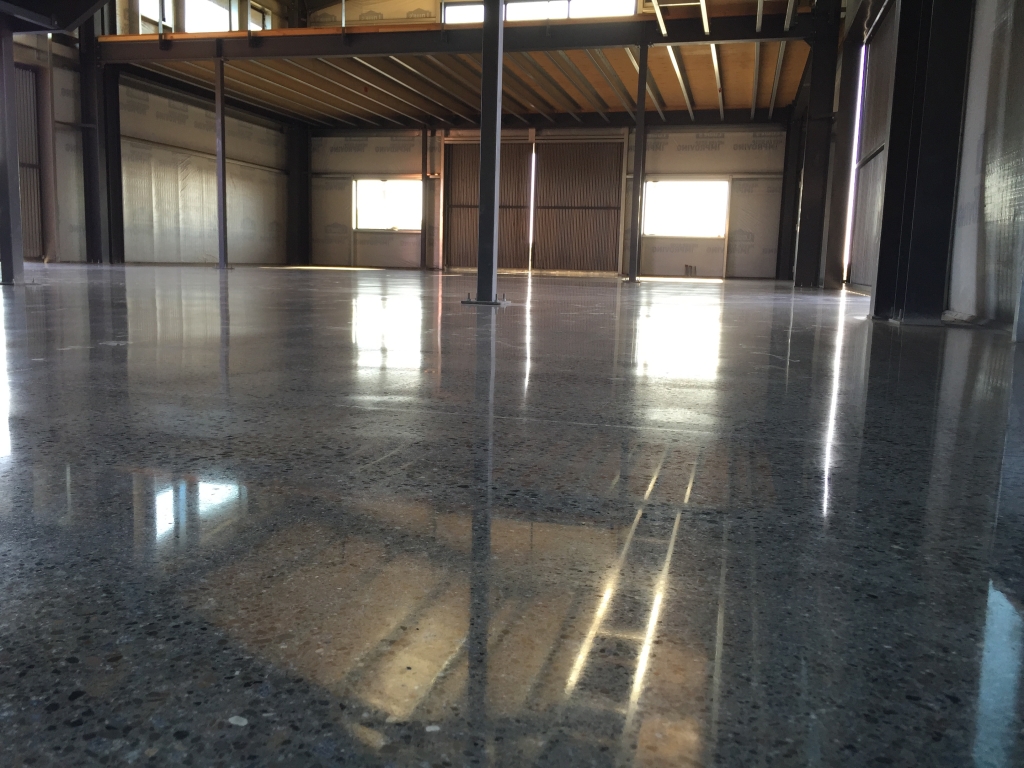
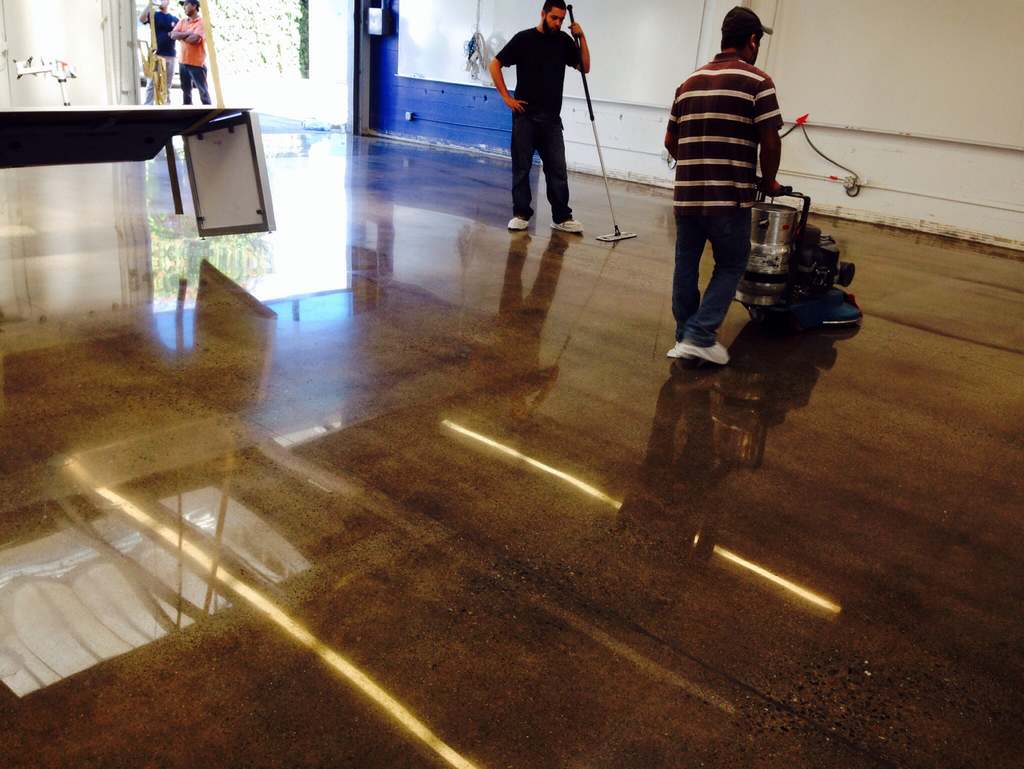 As you can see, it really gives the floor a glossy high end look and increases light reflectivity. It also increases Distinctness of Image readings (DOI) and gives the floor more clarity. Think of it as high definition for concrete. It also strengthens the guard product making maintenance a bit easier.
Burnished Goodness
Whats that? You don’t want a shiny floor? More into a post-zombie apocalyptic, steam punk, raw industrial look? No problem, burnishing your concrete floor is an optional step that can be left off. We had a client that wanted to see what it would look like both ways, here is that result.
Burnished on the left, Unburnished on the right
What should I expect to pay for such a marvelous product, you ask? 5 easy payments of $19.99? Not even. Burnishing is a very fast process, (as opposed to the grinding) so there is very little difference in price between the two. So it all comes down to how you want your concrete floor to look. Here are two more pictures of black polished concrete floors we built to drive it home…
Unburnished
Burnished
Get it? Got it. Good! You in the back with the drool on your chin, you still have a question? Call us at 855.544.7654 and we will help you out. For the rest of you that got this far, Congratulations! This concludes today’s lesson. Now flush the toilet and let your children out of their cages already. Who puts their children in cages, anyways?
]]>http://worldofconcrete.com/CREWSTHATROCK2015
Or better yet, go directly here and vote for Clean Cut Concrete!
https://www.surveymonkey.com/s/M6QK57G
We worked really hard on this project and our leveling, cement topping slab, and diamond polished concrete all came out wonderfully.
Thanks and we hope to see you at WOC in Vegas this February! Here is the project overview:
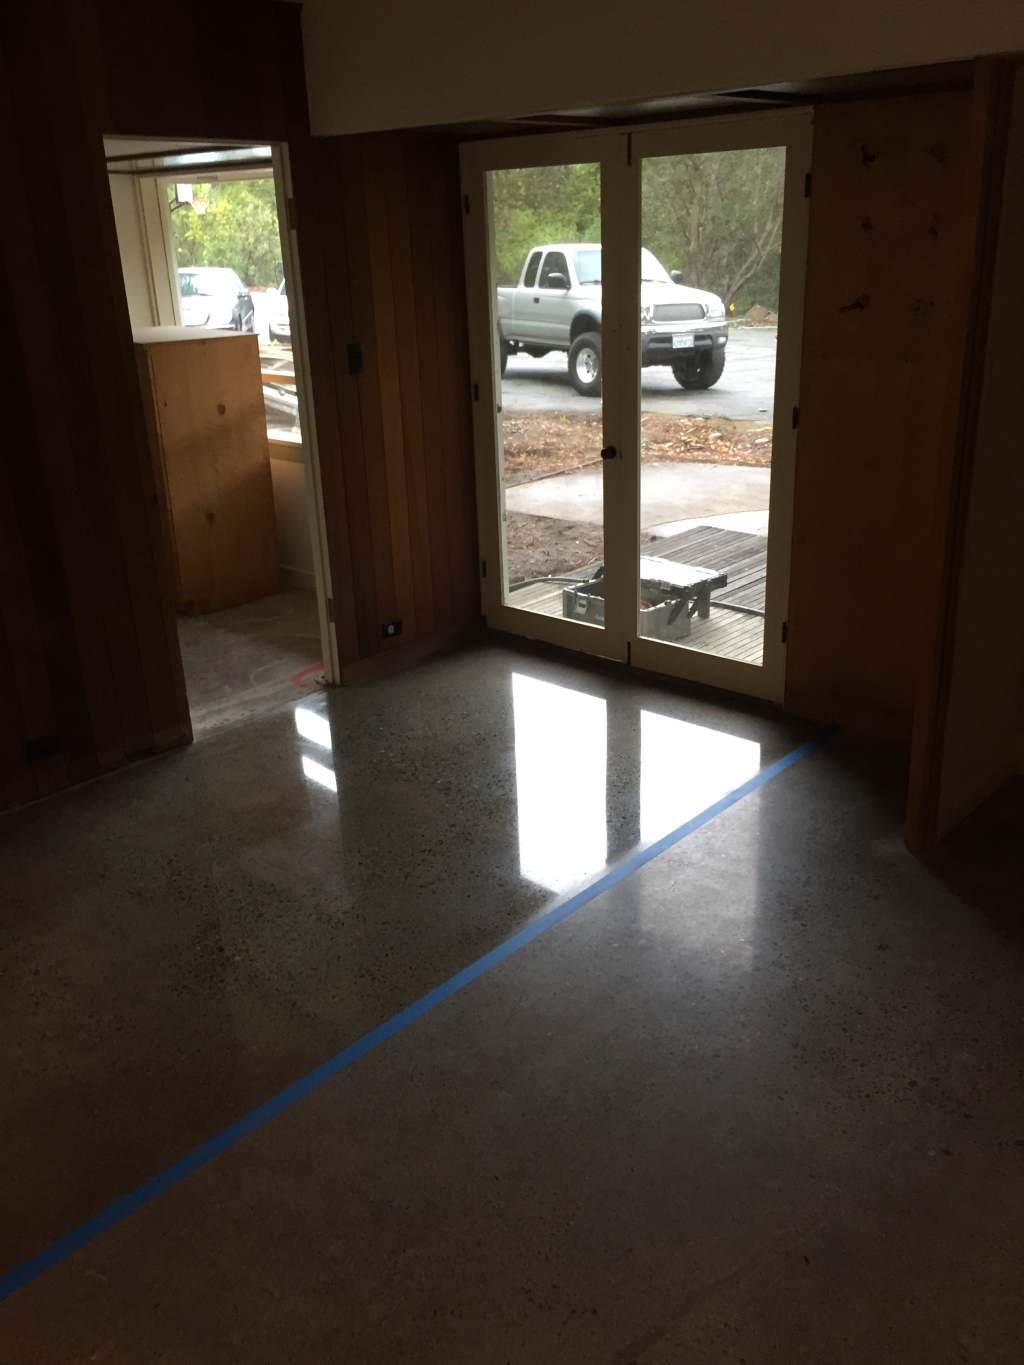
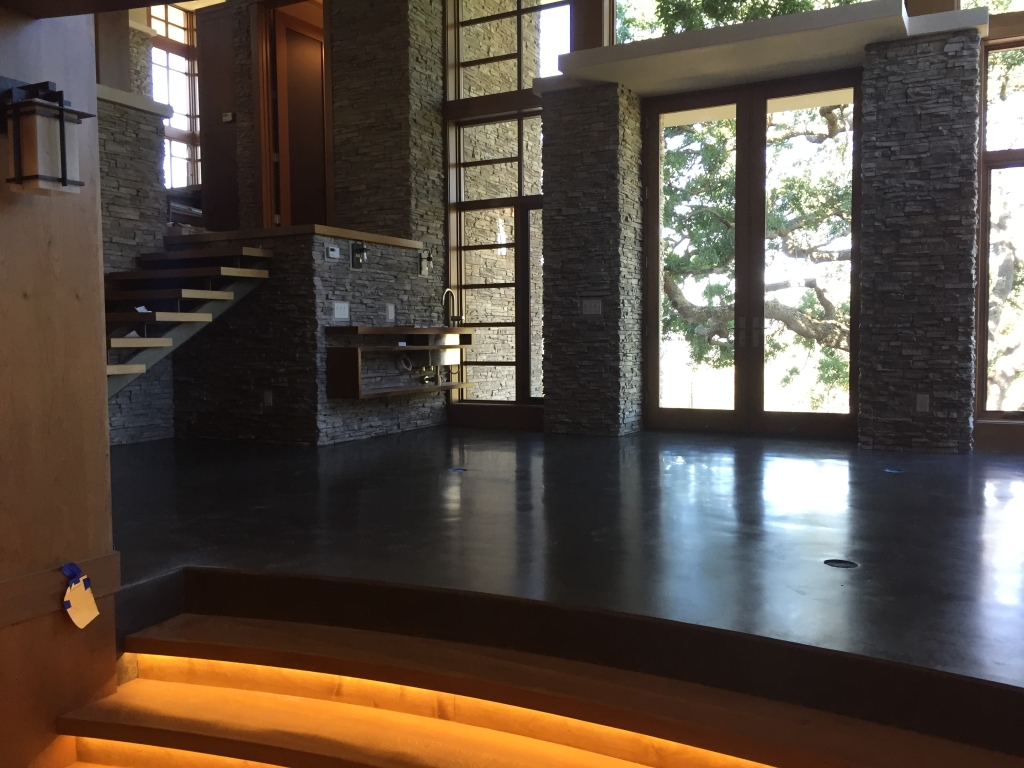
“Our topping and polishing crew truly rocks! Lets layout the project: an 1,800 SF open floor plan residence for a discerning industrial designer with a subterranean workshop/nerd lair full of laser cutters and 3D printers. Thing is, the guy wants natural light down there and a polished concrete floor up top. Fast forward and we are pouring 2 inches of TRU Levelflor into wood decking that has radiant heat tubing sandwiched between two layers of spiderlath. Did I mention that the whole front of the house is fitted with accordion glass that can be opened and the floor is fitted with QTY 7, 4 SF skylights that are located to catch the brilliant California afternoon sun and beam it down to his workshop? We then bead blasted the leveling lift, applied primer and sand, and poured a 3/8” TRU topping with custom agg/integral color blend. The crews really pushed them selves to get the pour to the exact correct elevations, and massaged any undulations with hand grinding equipment once it was hard. We then ran the floor up to 1500 Grit with 3 of our Husky 820s, and left the owner with a mind blowingly unique floor he can brag to his buddies about for years to come.
I should mention that during the difficult days, particularly the pours, our crews were extremely focused on the task at hand. They worked and communicated with calm demeanors in the midst of two hippo mixers pushing 5 bags of product every 2 minutes. They solved problems like leaks, uneven stainless steel forms, and leveling issues days in advance. They practiced and re-practiced their timing leading up to the first batch being mixed. Our crew understands when things have to go right, and they approach those situations with serious professionalism. They drive us to make these floors better. One of them told me “when someone sees this floor, I want them to think of me. I want everyone to know I made this floor. And that no one else can make it this good.” That’s when I knew I had a crew that rocks!”


Sealed Concrete (typical acrylic sealer): Installation – The concrete is cleaned and allowed to dry. A thin layer of acrylic is spread on the concrete, applied in a similar fashion as paint. Once dry, the surface is shiny because there is a thin layer of acrylic plastic that has filled the voids of the concrete.
Some sealers are specially formulated to prevent moisture intrusion under finished floors, and often times sealed concrete is used for cheap, low traffic areas (such as stairwells, IT rooms, file storage, etc.). The problem with sealers other than being generally ugly is that they wear out quickly and are susceptible to damage by moisture coming up through the slab and heavy traffic/impact on the top of the slab. Each time something passes over the surface it will erode until the sealer is gone and you are back to bare concrete (especially in high impact areas like right at a door or high traffic pathway or route). These surfaces are prone to needing re-waxing and resealing regularly and never have the same clarity or “pop” as a piece of correctly polished concrete (even on day 1).
Sealers can help prevent freeze thaw issues in cold areas and are used often for exterior purposes or on the CMU walls of your uncles basement of his house in the river bottom, but as an interior surface for high traffic they just don’t cut it. They also aren’t as good for the environment as they have higher VOC’s and require much more physical material and maintenance than polished concrete
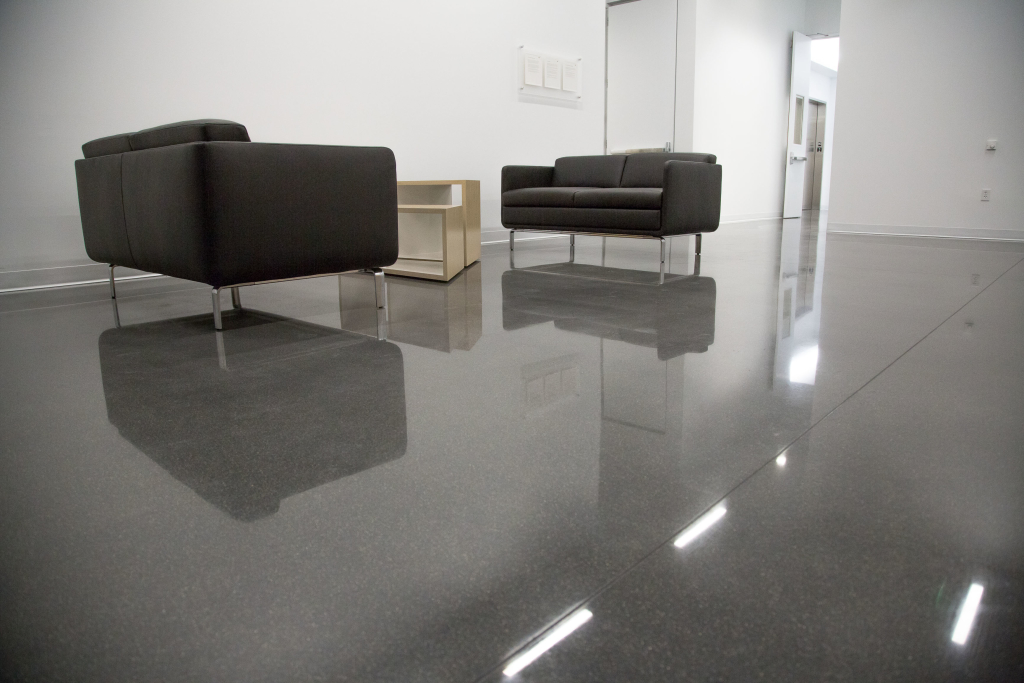
 Polished Concrete: Installation – Polished Concrete floors are built by grinding the surface of the concrete with ever finer grits of diamond blades, until the surface is completely smooth and scratch free. During these grinding passes, control joints, cracks, spalls, and other imperfections can be filled and repaired to make a seamless floor. During the grinding, various aggregate and concrete features that have been buried since placement become visible creating a beautiful, one of a kind floor. Depending on grit level; a glassy, mirror like finish can be achieved. The best part is ready mix companies nearly always use local aggregate so you are exposing regional color, character, and roots!
During the grinding, a penetrating lithium silicate densifier is applied to react with the concrete producing insoluble calcium silicate hydrate within the concrete pores. The increased surface hardness imparted by the densifier reduces dusting, staining, and maintenance producing a cleaner, healthier environment. This happens within the concrete, not on the surface meaning traffic will not greatly affect the finished product.
Polished Concrete is therefore a great choice for high traffic, high visibility areas that should be functional, beautiful, and long lasting. Some great examples are open office areas, lobbies, elevator landings, cafeterias, conference rooms, hallways, bathrooms, chemical storage areas, bike storage areas, game rooms, and whatever else you can dream up!
In conclusion; the installation, finished product, maintenance, and lifespan of sealed and polished concrete are TOTALLY DIFFERENT. They each have their place in the universe, and we’ll surely touch on this topic again in subsequent posts. In the meanwhile, the next time you are walking on a gorgeous piece of polished concrete, take notice! Or let us know if you would like to tour one of our projects so you can see what we mean. And remember the link in the beginning of this post; when something beautiful is in front of you, stop to enjoy it!
]]> It has been an busy few months here, and we are excited to announce our new venture, Clean Cut Concrete! We provide the highest quality polished concrete floors for the Silicon Valley, San Francisco Bay Area, Northern California and beyond! We are thrilled to see what kind of creative concrete polishing projects the amazing SF Bay Area Architects, Designers, and Contractors conceive for us.
Our team has successfully completed acres of scope on dozens of projects together for many of the Silicon Valley’s biggest companies.
We are currently underway on several exciting projects, which we will feature here soon. We are thrilled to be ready to build you The World’s Finest Concrete Floors!
Please feel free to comment below or reach out to us via email, phone, text, tweet, smoke signals, telegraph, homing pigeon, or the good old message in a bottle. We value your input and want to hear what you have to say!
]]>